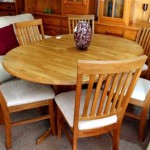
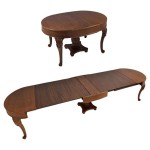
How to Refinish a Wood Dining Room Table
A dining room table is a central piece of furniture in many homes, often serving as a gathering place for meals, games, and conversation. Over time, a wood dining room table can show signs of wear and tear, such as scratches, dents, and faded finishes. Refinishing a wood dining room table can restore its beauty and extend its lifespan. This process involves sanding, cleaning, staining, and sealing the table's surface, revealing the natural grain of the wood and enhancing its appearance.
1. Prepare the Table for Refinishing
Before you begin sanding, it's essential to prepare the table. This involves removing all hardware, such as legs, drawer pulls, and any attached leaves. If the table has a tablecloth or other coverings, remove them as well. Next, cover the surrounding area with drop cloths or plastic sheeting to protect it from dust and debris. It is helpful to use a tack cloth to remove any dust particles from the table surface before sanding.
Next, inspect the table for any loose or damaged parts. If you find any, consider repairing them before proceeding. If there are any cracks or gaps, you might need to use wood filler to fill them in. Allow the filler to dry completely before sanding. This will help the final finish to be smooth and even. For large projects, consider using an orbital sander with various grit sandpaper. For smaller projects, or for detail work, use sandpaper wrapped around a sanding block.
2. Sanding the Table
Sanding is the most crucial step in refinishing a wood dining room table. It removes the old finish and prepares the surface for the new one. Start by sanding the table with a coarse-grit sandpaper, such as 80-grit, to remove any imperfections or old finish. This step might require several passes to fully remove the existing finish. Sand with the grain of the wood, which you can usually see easily when looking at the table. Be sure to sand all surfaces of the table, including the legs and apron. Sanding against the grain will leave visible scratches. Use a finer grit sandpaper, such as 120-grit or 150-grit, to smooth out the surface. Continue sanding with increasingly finer grits, up to 220-grit or 400-grit, to create a very smooth surface.
It is essential to use a dust mask and eye protection to protect yourself from sanding dust. Also, be sure to vacuum up the dust after each sanding pass to prevent it from settling back onto the surface.
3. Cleaning and Staining the Table
After sanding, clean the table thoroughly with a damp cloth to remove any dust or sanding residue. Be sure to use a clean cloth for each pass, as you don't want to introduce dirt back onto the surface. Allow the table to dry completely before proceeding. At this point, you have the option of applying a wood stain to change the table's color or to enhance the natural grain of the wood. Choose a stain that complements your décor and the table's existing color. If you choose to stain the table, follow the manufacturer's instructions carefully.
Apply the stain evenly to the entire surface of the table. Use a brush, rag, or sponge to spread the stain, making sure to cover all areas. Work quickly and smoothly to avoid streaks. Wipe off excess stain with a clean cloth after the recommended time. Be careful not to let the stain dry too long on the surface, as this could create uneven color. Allow the stain to dry completely before moving on to the next step.
4. Applying a Finishing Coat
The final step is applying a protective finishing coat. This provides a durable surface and enhances the table's appearance. Choose a suitable finish based on the table's use and desired appearance. Popular options include polyurethane, varnish, oil, or wax. Each finish has its own benefits and application techniques. Polyurethane is known for its durability and water resistance, while varnish offers a high-gloss finish. Oil penetrates the wood, enhancing the natural colors and providing a protective layer. Wax is easy to apply and provides a soft sheen. You can use a brush, roller, or spray to apply the finish. Follow the manufacturer's instructions for application and drying time. Apply thin, even coats, allowing each coat to dry completely before applying the next.
Once the finish has dried, you can reassemble the table, attaching the hardware and any leaves. Wipe down the table with a clean cloth to remove any dust or debris. Avoid using harsh chemicals or abrasive cleaners on the refinished table, as these could damage the finish.
With proper care and maintenance, your refinished wood dining room table can last for many years, serving as a cherished centerpiece in your home.

Dining Table Makeover How To Refinish A Youtube

How To Refinish A Table Sand And Sisal

Refinishing A Dining Table Diy Beautify Creating Beauty At Home

How To Refinish A Dining Table Shades Of Blue Interiors

Dining Room Table Makeover Refinishing A Wood Veneer Stacy Risenmay

How To Refinish A Table

Diy Refinished Dining Table Top Redhead Can Decorate

How To Paint A Dining Table 3 Minute Makeover Youtube

Dining Room Table Makeover Refinishing A Wood Veneer Stacy Risenmay

How To Refinish A Worn Out Dining Table


