Making A Farmhouse Dining Table
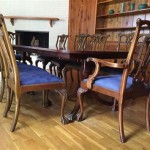
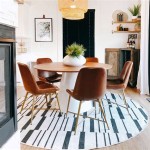
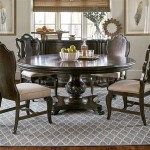
Wooden farmhouse dining tables are a popular choice for many homeowners. They are sturdy, stylish, and can be customized to fit any space. If you are looking for a way to add warmth and character to your dining room, a farmhouse table is a great option.
Building a farmhouse dining table is not as difficult as it may seem. With a little planning and effort, you can create a beautiful and functional piece of furniture that will last for years to come.
Materials You'll Need
- Tabletop: 1-inch thick hardwood (such as oak, maple, or walnut)
- Legs: 4-inch x 4-inch hardwood (such as oak, maple, or walnut)
- Apron: 1-inch x 6-inch hardwood (such as oak, maple, or walnut)
- Breadboards: 1-inch x 12-inch hardwood (such as oak, maple, or walnut)
- Wood screws
- Wood glue
- Clamps
- Finishing nails
- Wood filler
- Sandpaper
- Stain or paint
- Polyurethane
Tools You'll Need
- Table saw
- Miter saw
- Drill
- Countersink bit
- Clamps
- Sander
- Finishing nailer
Step-by-Step Instructions
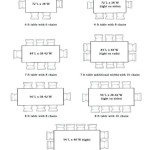
1. Cut the Tabletop The first step is to cut the tabletop to the desired size. The size of the tabletop will depend on the number of people you want to seat and the size of your dining room. Once you have determined the size of the tabletop, use a table saw to cut the hardwood to the correct dimensions. 2. Cut the Legs The next step is to cut the legs to the desired height. The height of the legs will depend on the height of your chairs and the desired height of the table. Once you have determined the height of the legs, use a miter saw to cut the hardwood to the correct length. 3. Assemble the Apron The apron is the frame that surrounds the tabletop. To assemble the apron, cut the hardwood to the desired length and miter the corners. Then, use wood glue and wood screws to attach the apron to the underside of the tabletop. 4. Attach the Legs Once the apron is attached, you can attach the legs. To do this, use wood glue and wood screws to attach the legs to the corners of the apron. 5. Attach the Breadboards Breadboards are used to prevent the tabletop from warping. To attach the breadboards, cut the hardwood to the desired length and width. Then, use wood glue and wood screws to attach the breadboards to the ends of the tabletop. 6. Sand and Finish Once the table is assembled, you need to sand it and apply a finish. To sand the table, use a sander to remove any rough edges or splinters. Then, use a tack cloth to remove any dust from the table. Once the table is sanded, you can apply a finish. You can use a stain or paint to give the table the desired color. Once the stain or paint has dried, you can apply a polyurethane finish to protect the table from wear and tear. 7. Enjoy Your New Farmhouse Dining Table Once the finish has dried, your farmhouse dining table is complete. Enjoy your new table with your family and friends!
Diy Modern Farmhouse Dining Table For Under 120 The Beauty Revival

Diy Small Farmhouse Table Plans And Tutorial

Building A Farmhouse Table For Our 1760 Maine Dining Room

Farmhouse Table Remix How To Build A East Coast Creative

Diy Farmhouse Bench Love Grows Wild

How To Make A Diy Farmhouse Dining Room Table Restoration Hardware Knockoff Tips For

How To Build A Farmhouse Dining Table Green With Decor

Custom Farmhouse Table Build

Diy Small Farmhouse Table Plans And Tutorial

Diy Farmhouse Table The Turquoise Home